Pages

Wednesday, June 16, 2021

#158 Spin The Butterfly Wheel with P for Plaited Fold.

Welcome Back
The Winners  for #157 have been published in post below this one. 

Come on in.
Lets Spin the Butterfly Wheel.
Each challenge will be a letter of the Alphabet with  a choice of 3 Colours , 1 Theme and a specified  Card shape  all beginning with the chosen letter.

(The discerning amongst you will notice that there is an added page along the top under the Butterfly Banner called Card shapes.)
 I will be showing a link to a tutorial on this page with hints and tips for making the cards so just look under the letter being used for each challenge. 

The card shape is not mandatory but if you do use it you will qualify for the top prize. You must of course use your butterfly and the other elements.  The shapes will all be easy ones, just a different way to either fold or cut your basic cardbase. 

The card shape is not mandatory but if you do use it you will qualify for the top prize. You must of course use your butterfly and the other elements.  The shapes will all be easy ones, just a different way to either fold or cut your basic cardbase. 
If you don't want to use the card shape then 
You can either choose a Theme or a Colour from the wheel + Butterfly  to be entered  for the 1st Prize.
If you use a Butterfly + a Theme + a Colour from the wheel then 
you  will  be entered into the 2nd Prize. 
Please state in your post which part of the wheel you are using to play with.

So lets get started.

The wheel is
P
and 
Plaited Fold Card.


Your 6  elements are:
Plaited  Fold/ Periwinkle/Peach/Plum/Pairs
+your Butterfly.

N.b.  Periwinkle = Light Blue
Plum = Light Purple
Pairs = Two of an item.  
 

Please state the elements of Your Choice.

Here is my inspiration for you.


You can see more details of the card here on my blog.
Also the tutorial for making this style is on the Card shape Page at the top under the banner header. 


1st Prize.
(for using either One Theme or One Colour with your butterfly/ies)
Please state in your post which part of the wheel you are using to play with.

2 Butterfly design cardstock.
5 flower shapes
3 glitter Butterflies
Butterfly ribbon
Gold Gel pen.


2nd Prize.

 (for using both a Theme and a Colour + your butterfly/ies )
Please state in your post which part of the wheel you are using to play with.

2 sheets design cardstock
Butterfly washi tape
Fancy black biro pen
Joanna Sheen 'Mini Curly Flourish Die
Woodware Butterfly Stamp


Top Prize .
For using the  Plaited Fold  + all the other elements
+ your Butterfly

2 sheets design cardstock
Butterfly washi tape
Fancy black biro pen
Die-namics Simply Scallops Trio Die
Woodware Pretty Flutterby Stamp


From time  to time I will also have a special draw prize when an entry particularly catches my eye.  

Please be sure to read all the rules on the tab above.

Enter your creations in Mr Linky below.
Please also state if you are only playing for fun.

Happy crafting and see you soon.

This challenge will be  running for 3 weeks.
Challenge will therefore end 
Tuesday 6th July. 8pm (GMT)


Winners #157

Thankyou all for coming and playing along each week.There were 28 cards after a last minute flutter in the garden. Not so many of you tried the Napkin Fold but those that did all look terrific so thank you. 

I have selected the following non shape cards for my top 3 and in numerical order they are as follows: 

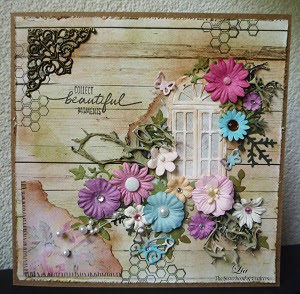
#1 Lia

So many complimentary elements to see on this card.

#19 April W. 
I love the bold background and the striking butterfly.

#25 Ma-Mi
Love the vintage paper used for the Daisies.


Napkin Fold cards in numerical order are as follows:


#11 Annie

Love the pattern created by the design ppers.

#18 Liz Cavill
Another great paper combination. 

#27 Susan Renshaw
Wow, I  wasn't expecting this to be inside. 


Congratulations everyone.
please take a bow and help yourselves to
The Top 3
Badge from the side bar.

The Prize winners are as follows.

1st Prize.
(for using either One Theme or One Colour with your butterfly/ies)

The Winner picked from the tea cup is:


(9) Kathy Asper


2nd Prize.

 (for using both a Theme and a Colour + your butterfly/ies)

(17)  Janis in ID


 Top Prize  

 (for using the Napkin Fold Card+ all other elements + your butterfly/ies)

The winner picked from the Tea cup is:

(26) Suze


 Kathy,Janis and Suze
Please get in touch using the email address in the side bar to collect your prize.

Please also take the Winner's Badge from the side bar.
Can I also please ask that you acknowledge your win
In the comments box below so that 
I know to expect an email from you. 

New challenge is running for 3 weeks 
and will therefore close on Tuesday 6th July 8pm (GMT)

Hope to see you all back.
for #158


Stay Safe.


Monday, June 14, 2021

Quad Easel

Q
is for 
QUAD EASEL CARD.


N.B. This is a lengthy post with a lot of pictures!!

1. For  the base card cut cardstock 29.5cm x 14.5cm. Score in half and fold.


2. Decorate the front with a design paper which is Not directional with its pattern.
3. Cut (4) pieces of plain card 13.6cm x 6.8cm

4. Cut (4) pieces of plain card 6.8 cm x 6.8cm
5. Cut (4) pieces of patterned design paper 6.5 cm x 6.5cm. Do not use a direction pattern such as hearts or stripes as this will complicate the instructions further down. 

6. Cut a further (4) pieces of design paper using a different  pattern. 6.5cm x6.5cm
7. On the 4 long panels ( see 3. above) score and fold in half and then score the top half corner to corner as below. N.b. To be scored all in the same direction. ie. top right down to bottom left. 

8. Choose one of your patterned 6.5cm sq designs and attach below the scored top half. Attach the second pattern design paper to the 6.8cm plain squares as shown below.
9. Attach d.s. tape to the folded down triangle as shown below. 
10. Attach  the 6.8cm sq card and press down firmly.   On the back attach 3d dimensionals. (I always use strips of the waste cardstock.This is 3 stripes glued together which i find gives a nice clearance without being too high.)
11. Now cut  card stock as follows.
4 pieces ( ie.magenta card) 2.2cm x 6.5cm
4 pieces (ie. green card)  1.8cm x 6.5cm
4 pieces (ie. Pattern design) 1.5cm x 6.3cm  (slightly shorter).
12. Layer all 3 pieces together and then using 3d.dimensionals attach across the base of the easel card. I have placed mine at 1.5cm up from the bottom as shown below. N.b. Where you place this strip will decide how much the easels open up. Much higher/lover than this when you place on the base card then they could get caught against each other. This is also  where you do not want to have used a directional design on the easel base as they get turned placing on the card base. If you choose to do so then you will have to think it through carefully as you construct each easel card. 
13. Your mini easels should now look like below. 

14. It is best to go ahead and decorate them now before attaching to your base card. 
15. Close up of two from above. 

16. Now choose how you want the base card to open.  Hinged at the the top
17. Or hinged at the side (as a conventional card would be.
18. Starting at the bottom left put  your first easel in place (n.b. do not attach at this point to the base of card.)
19. Place second easel as shown below and rotate  base clockwise.

20. Now add third easel as below and rotate clockwise. 
21. Add last easel as below.
22. When you are happy with the spacings and the sentiments are where you want them to be then finally add to the base either using 3d dimensionals as in (10 above)
or as in my case the strips of glued together card stock that I have applied d.s. on. 
23. Your finished card should look like this.
24. Card folded flat for posting.
25. Displaying one easel propped up.  
26. Decorate the inside of your base card as required.