The Butterflies are back with another card shape for you.
Whilst I do have lots of new card shapes to try I don't have one to use for each letter of the Alphabet so this time round we are going Random and some letters will be used more than once and in any order!
The next letter out of the Tea cup is
the letter
L
Come on in.
Lets Spin the Butterfly Wheel.
Each challenge will be a letter of the Alphabet with a new choice of 4 Colours , 1 Theme and a specified Card shape all beginning with the chosen letter.
As before I will be showing a tutorial for each of the card shapes.
A link to the tutorial page is shown above under the banner heading. Just click on the Card Shapes tab and you will be taken to a drop down list of all the past and present card tutorials.
You must of course use a butterfly on your entry but there are now two categories for you to choose from.
1. Make any card using at least 2 of the colours on the wheel +butterfly.
2. Make a card using the Card Shape +any 2 of the colours + the theme +butterfly.
There will be a prize for each category.
Please state in your post which part of the wheel you are using to play with.
There will be a special prize draw for using all elements on the wheel.
So lets get started.
The wheel is
L
and
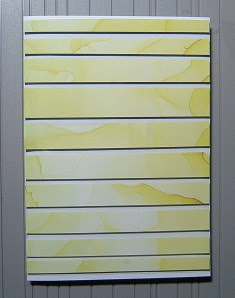
Latch Fold Card.
This is a nice easy shape with just 3 folds.

These are the four colours to choose from.

The theme is Lace either Real or Faux.
Please state the elements of Your Choice.
Here is my inspiration for you.
Using from the wheel:
Lach Fold/Lace/Light Pink/Lavender/Butterfly


Using from the wheel:
Latch Fold/Light Pink/Lettuce/Butterfly


Using from the wheel:
Latch Fold/Lace/Lake Blue/Light Pink/Butterfly

Prize.
For entering any card using any 2 of the colours + your butterfly
Please state in your post the colours you are using.

Butterfly ribbon
Couture Creations Embossing folder 'Ornate Diamonds'
Creative Expressions 'Caroline's elegant Damask'
Clarity Stencil
Penny Black Stickeroos sheet
Elizabeth Craft Designs 'Thanks' die
Prize.
For entering a Latch Fold card using any 2 of the colours + Theme + your butterfly
Please state in your post the colours you are using.

Butterfly ribbon
Woodware 'Mosaic Butterflies'stamp
Creative Expressions 'Caroline's elegant Damask'
Clarity Stencil
Penny Black Stickeroos sheet
Elizabeth Craft Designs 'Friends' die
For anyone choosing to use all of the Wheel
their names will go into the teacup for a special Prize.
Please be sure to read all the rules on the tab above.
Enter your creations in Mr Linky below.
Please also state if you are only playing for fun.
Happy crafting and see you soon.
This challenge will be running for 3 weeks.
Challenge will therefore end
Tuesday 5th April. 8pm (GMT)