
C
is for
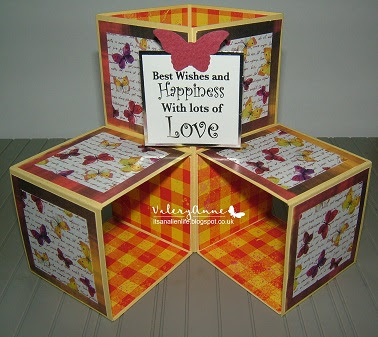
CUBE CARD.
Version 1.
This is a picture of a finished card using the design instructions to make.
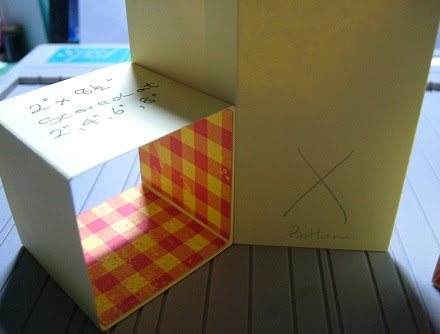
1. These instructions are for making a card that when closed down flat will measure
4"x 4".
Cut a piece of card stock 8.5" x 8".
On 8.5" side score all the way down to the bottom at 2", 4", 6" and 8".
On 8"side mark and cut at 2" and 4".
This will give you three pieces of scored card stock.
1 strip measuring 4" x8.5" and 2 strips that measure 2" x 8.5"


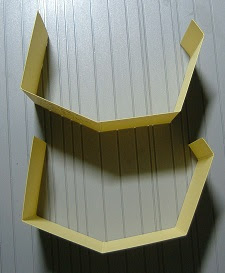
2. Take the larger piece and fold at the score lines as shown below.

3. Repeat with the 2" strips.
4. Lay the strips back out flat and adhere d.s. tape to each of the half inch flaps as shown below.

5. Turn the 4" (Large strip) over and apply design paper on the two panels shown below.

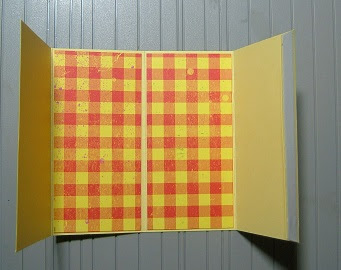
6. Fold the right hand side over and remove the backing tape.

7. Fold left hand side over to close and seal.

9. Turn the 2" (small strips) over and apply design paper on the two panels shown below.


11. Fold left hand side over to close and seal.

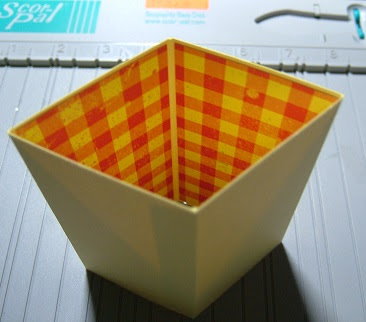
12. Your cubes should now look like below when stood up.

paying attention to where the design papers have been adhered on the insides of the cubes.


15. Attach the second cube in the same way.

16. Card should now look like below with your chosen design paper all facing outwards.

17. The cubes now need to be decorated so choose 2 different complementary design papers.
Cut six pieces a little smaller than 2" x 2".
Cut six pieces 1.5" x 1.5".
Adhere a large square with a small one on top as shown below.


18. Cover the back with design paper and white card stock with space to leave a message.


20. Cut two narrow strips of cardstock. N.B.(These do not have to be very big, no more than 1.5" long as you are just creating wings on the back of the sentiment in order to attach to your card. As my sentiment is only small I have cut them to the same size as the sentiment.) Fold each one in half.

21. Place folded strips on your marked line and glue in place.


22. Place glue on the remaining flaps shown above and adhere to the front of your card by folding card flat as shown below and attaching a flap on either side of the fold.

Sentiment folds flat posting.

Version 2.
This is a picture of a finished card using the design instructions to make and is just a larger version which gives more space for inserting a sentiment/image between the bottom cubes.

1. These instructions are for making a card that when closed down flat will measure
5.5"x 5.5".
Cut a piece of cardstock 5.5" x 11.5".
On 11.5" side score all the way down to the bottom at 2.75", 5.5", 8.25" and 11".
Cut 2 pieces of cardstock 2.75" x 11.5"
On Each 11.5" side score at 2.75",5.5", 8.25" and 11"
2. Continue making the cubes in the same way as in version 1. Just adjust the sizes of the design paper panels for the large cube to be 2.5" x 5.25".
The Design squares for decorating the cubes will be slightly larger too.
Cut 6 design papers at 2.5" x 2.5" and 6 design papers at 2.25" x 2.25"
Version 3.
This is a picture of a finished card using the design instructions to make a Cantilever
Version.

1. Use the instructions and sizing for Version 1 but instead of adhering the two smaller cubes side by side as shown in steps 15/16 simply offset one cube at the top.
I have not seen this done anywhere else so this is my idea.

No comments:
Post a Comment