P
is for
PILLAR CARD.
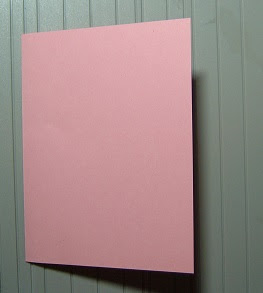
Version I
This is a picture of a finished card using the design instructions to make.
1. Cut cardstock 10.5" x 5.5".
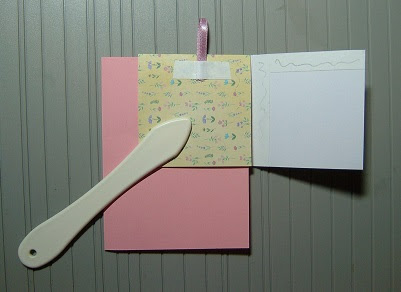
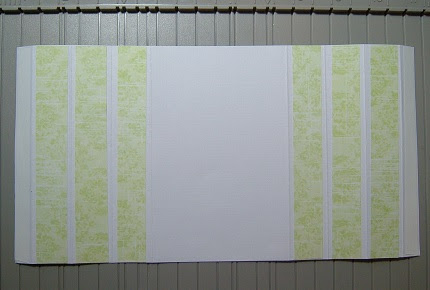
2. Then score on long edge at 0.5",1.5",2.5",3.5", 7", 8", 9", 10"3. Fold each score line inwards as shown below.4. Cardstock should be shaped like this when stood up on one long edge.5. It is easier to decorate the panels flat before you make into the pillars either end.Lay card back down flat with the creases upper most. The center section I have left blank as this will be the back of the finished card and can have your message written on it for the recipient. Adhere d.s tape to the two outside folds (i.e 0.5" panels)
6. Now turn over and adhere your patterned paper to the middle section only. This will be the inside panel on the finished card. 7. Remove the d.s.tape and fold the outside edges in, to form the pillar. In the picture below I have already created the left hand pillar.It is easiest to form the pillars with the cardstock lying flat so tuck the d.s.tape edge under and fold the next two panels down onto the cardstock base. Once adhered down you can shape them back up into the pillar. 8. The card is now ready to be decorated as you require. Attach your embellishments only to the pillars on each side so that the card can then be folded down flat for posting. N.b. Do not attach to the back panel as well otherwise the card will not open back up.
Version II
This is a picture of a finished card using the design instructions to make. This card is the same as before but is made wider.
1. Cut cardstock 11.5" x 5.5". Then score at 0.5",1.5",2.5",3.5", 8", 9", 10", 11"2. Decorate the panels as before. Here I have covered the back panel as it is wider. I will add a smaller white panel insert for the message to be written on. 3. Decorate inside panel as before and follow the same instructions above to complete the card.
Version III
This is a picture of a finished card using the design instructions to make. This is a single pillar card. You can make the pillar to be either on the left or right hand side. Here I have chosen to place on the left.
You can see from the picture below that the panel is placed in the centre of the pillar. The pillar is 1" square so the panel has 0.5" in front of it and 0.5" behind.
1. Cut cardstock 6.5" x 6". This is the base panel. Cut a second piece to be 5" x 6" This makes the pillar.
2. Score the 5" x 6" piece along the 5" length at 0.5",1",2",3",4",4.5"
3. Then fold on each score line as below. Decorate the panels marked with X and also decorate the back panel.
4. Card should now look like below. Adhere d.s. tape to the 0.5" edges on the same side as you have attached the design paper.
5. Place the folded cardstock face down onto the back panel (i,e design papers together) remove the d,s, tape backing and adhere down so that the two edges on the left are together.
6. Open out. Cardstock should look like below.
7. Turn over and bring the other edge of scored cardstock round to form the rest of the pillar and adhere the same as before.
8. Your card should now look like below with the back panel attached in the center of the pillar.
9. You can now finish your card as required.
Version IV
This is a picture of a finished card using the design instructions to make. Very similar to the card above except the back panel is smaller and the pillar is adhered to the front and the finished card will look like version I but with only one pillar.
1. Cut cardstock 8" x 6" and score along the 8" length at 0.5",1.5",2.5" 3.52. Fold on the score lines the same as in version 1. Form the pillar in the same manner as instruction No 7. You can make the pillar to be on the left or on the right. Here I have made it on the left. Decorate and finish card as required.