
S
is for
SPANNER PANEL CARD.
So called as a strip of card joins the two side panels together
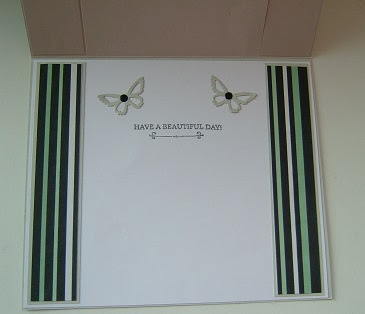
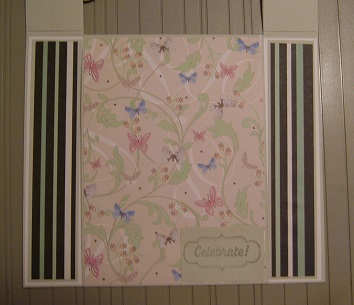
This is a picture of a finished card using the design instructions to make.
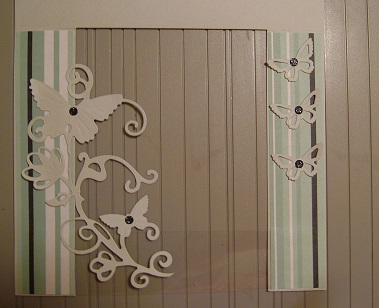
This version uses acetate as the spanner 'bridging' the side panels together.

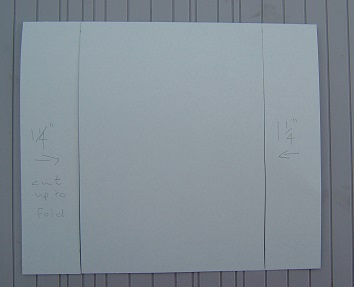
1. Cut a piece of cardstock 11" x 6.5" and score at 5.5" along the 11" width.

Mark 1.25" in on both sides on the fold and draw a line to the bottom of the card. This is where you will make your cuts. N.b. on the front layer only!!) Use sissors or a trimmer to cut on the line drawn.
4. Decorate the middle space as required.

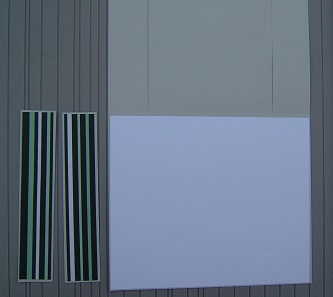
3. It is easier to build your card up from the base so open card up with the cut portions to the top and adhere a piece of cardstock to the base (making it just marginally smaller than 6.5" x 5.5"). Cut 2 side panels (1" x 5.25") to decorate each side making sure that they can't be seen when the front cut panels are closed down on top.

6. You are now left with the two side panels that were cut at the 1.25" mark.These will now be joined with a strip of card (here I have used a strip of acetate) to make the front of the card. My strip measures 5.5" x 1.25". Adhere to the front before decorating the side panels as this will give a neat tidy finish to your card.

a butterfly die cut swirl and attached to the acetate at the bottom and on the side panel. The opposite side panel has been decorated with 3 individual butterfly die cuts. Card is now complete.
8. Lift the completed front panel up to reveal the middle section which in turn lifts up to reveal the back section.


Completed card folded down flat for posting.


2 comments:
Great to see you back! This cardshape is so nice, I will give it a try@
Lia xx
I am excited to see you back and hope things are settling down for you....and that you are feeling much better. I have pieces of butterfly cardstock along with cutters and tools all over my desk to try out this card design. NO GUARANTEES!!! lol.... You know how I usu shy away from anything too complicated! So we shall see.... :)
Thank you for sharing these instructions.
<3 J
jwoolbright at gmail dot com
HerPeacefulGarden.blogspot.com
Post a Comment