D
is for
DOUBLE SLIDER CARD.
This is a picture of a finished card using the design instructions to make.


1. If you have A6 size card blanks then you will need two, otherwise cut an A4 sheet of cardstock in half length wise as shown in picture below. Fold each piece to give you 2 tent shapes.


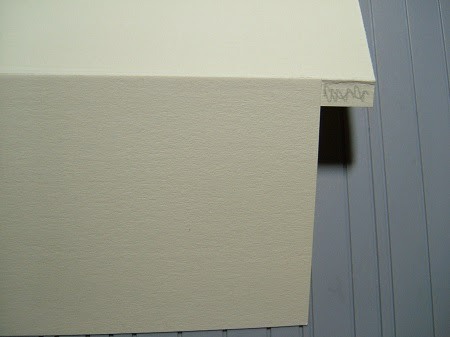
2. Take one of the folded cards, lay out flat and punch/die cut a small half circle from the bottom right as shown below.

3. When folded back in half (with the fold at the bottom) your card should look like this.

N.b. this will ultimately become the front of your slider card.
Place to one side.

5. Cut away the section ~~~~~~ as shown.
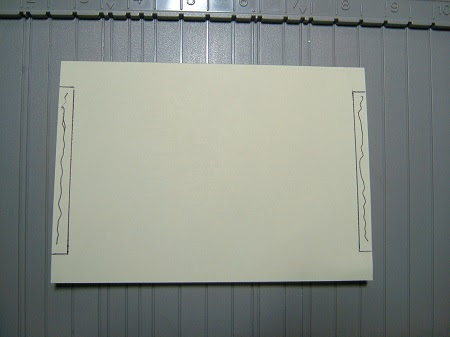
6. Cut a strip(just slightly thinner than the cut out section) from a plastic bag/food bag, long enough to go round like a belly band. Attach a thin strip of double sided tape to one edge.


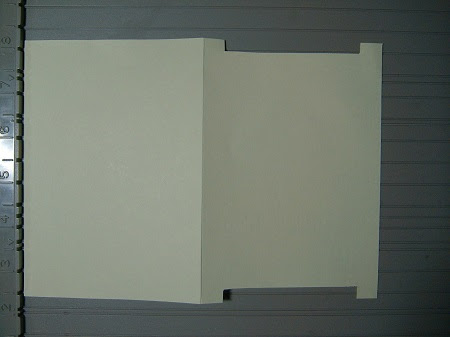
7. Adhere to the other edge to make a complete band.(Cut any surplus bag away to make sure it is a seamless join). This is the mechanism to make the slider work.

8. Now you need to cut two pieces of white card stock for the sliders.
These need to be half inch or 12mm smaller than your card front.( Depending on whether you are using metric or inches an A6 card front will be 10.5 x 14.8cm or 105 x 149mm 4.1 x 5.8 inches).

I have cut mine at 86 x 136mm.
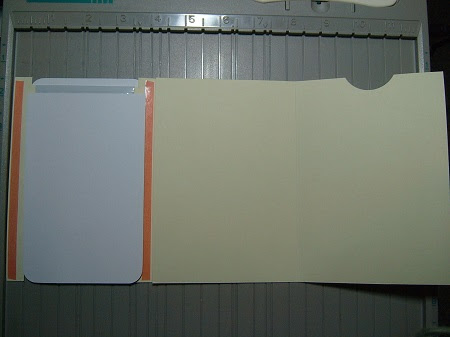
9. Round the outer edges as shown below. These are all the pieces now that you need to finish your slider card. Before adhering together though you need to decorate the two slider elements. (White card).

10. On mine I have used gold sentiment stickers and some butterfly transfers.

11. Once you have decorated you can adhere the panels in place on the strip of plastic. Cut a small strip of d.s.tape and adhere to the plastic as shown below.

12. Place the right hand slider card (with the decorated side showing)to the outside edge and once happy with the positioning adhere in place via the d.s. tape.

13. Turn over and adhere d.s. tape in the same position as before.

14. Now adhere the remaining slider panel in place making sure that the decorated side is face down and in the correct orientation (especially if there is any writing on it!)

15. Your slider element should now look like this.

16. Close the panels down and adhere a thin strip of d.s. tape to the top and bottom as shown below. N.b. Make sure that the tape is free of the slider panel.

17. Turn over and repeat on the reverse side.

18. Take the card front that you made at step 3. (and had placed to one side) and lay down next to the slider element as shown.

Then open the slider element.

19. Place the closed front cover on top of the back page so that the punched out half circle is uppermost.

20. Keeping everything in careful alignment open out as shown below.
21. Remove the backing from the d.s tape and fold slider down to adhere. Card should now look like this.
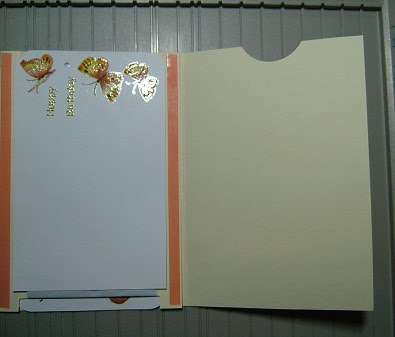
22. Remove the backing from the d.s. tape and adhere the card front down to encase the slider element.
Your card should now look like below.

23. Punch a small hole in the right hand slider and attach a small piece of ribbon to make the pull. I like this version of the slider card as it makes a tent fold so that the card will stand up on receipt and you can add a sentiment and your greeting on the inside.