Wednesday, November 25, 2020

Winners #149

Thankyou to everyone who came and played along in the new set of challenge letters.There were 19 entries. I am so grateful for those of you have taken the time to come along and play with me. Eleven of the entries were using the Fag Fold. 

I have selected the following non shape cards for my top 3 and in numerical order they are as follows:


#10 Elle-jeanne


#14  Alison C.


#16  Ma - Mi.

My top 3
Flag Fold Cards in numerical order are as follows:


# 6 Annie.


# 8 Pinky


# 15 Carol Gill

Congratulations everyone.
please take a bow and help yourselves to
The Top 3
Badge from the side bar.

The Prize winners are as follows.


1st Prize.
(for using either One Theme or One Colour with your butterfly/ies)

The Winner picked from the tea cup is:


(17) Kathy A.

2nd Prize.

 (for using both a Theme and a Colour + your butterfly/ies)

(5)  Tina Z.

Top Prize.

 (for using Flag Fold + all other elements + your butterfly/ies)

The winner picked from the Tea cup is:

(4)  Wilma

Kathy, Tina and Wilma.
Please get  in touch using the email address in the side bar to collect your prize.

Please also take the Winner's Badge from the side bar.
Can I also please ask that you acknowledge your win
In the comments box below so that 
I know to expect an email from you. 

  This is the last challenge for this year. The butterflies will be cocooned for the winter months and will return in the New Year. I am hoping that the Wretched Elf will not be putting in  an appearance this yr due to the travel restrictions in place from the North Pole and the strict 20 day quarantine rules in place. I have a plan up my sleeve though just in case!!

Hope to see you all back in the New Year
on 
6th January 2021
with the letter G. 


Hope you all have a Happy Christmas
and stay safe.
Remember we can all do without one Christmas 
but we can't do without our Loved Ones. 


Wednesday, November 18, 2020

K
is for 
KITE FOLD .


Version I

   1. Using coloured card stock cut one piece 11" x 4." and score and fold at 5.5" N.B. Don't use thicker than about 160gsm or it will be difficult to fold the creases.

2. I have changed to white copy paper for these instructions just to make it easier to see and read.  Make pencil marks on the long edge at 3.75" and 7.25" top and bottom. Also make a mark at 2" on the short sides.  Join up the 3.75" and 7.25" with a diagonal pencil mark to form an X shape in the centre as shown below. 

3. Now join up the X to the 2" marks as shown below. 


4. Cut the 4 outside triangles away as shown below. These are not required. Score along the X pencil marks to create the creases.

5. Use a bone folder to really crease each of the folds well. 


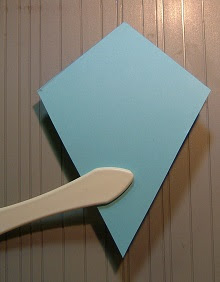
6. As you now fold the card in half the sides will begin to fold into the middle as shown below.
Gently fold into place to form the kite shape.
 Use a bone folder to really crease down on all the folded edges.

7. To decorate the kite you will need the following pieces.

        Cut two of each of the measurements as shown below using contrasting

        plain/designer papers.


8. Here is my selection. N.B.  As you can see the green design paper is directional so make sure you cut your pieces the same way up if doing the same. 


9. Cut each piece on the diagonal making sure that each pair of sizes are mirror images of each other as shown below.


10.  N.B. These are all the green design papers pieces turned over so that you can see the pieces you will need to select to decorate your kite are in the centre (i.e.forming the kite shape).You can use the other pieces to make a second kite card with. 


11. to finish your card you will also need the following pieces of card stock/ design papers.

        1 piece of cardstock for your base card measuring 11.5" x 4.5" folded in half             along the 11.5" edge

        1 piece of contrasting plain card measuring 5.5" x 4.25" for the first matt layer.

        1 piece of design paper measuring 5.25" x 4" for the second matt layer.

        1 piece of plain card for the matt inside the kite. To get  the measurement  lay             the kite card down on the  chosen card and with a pencil draw around the             kite. Cut out inside the lines so that the matt is slightly less in size as shown             below.

        1 Micro dot for the closure and a piece of string or ribbon to make the kite             tail. Here is my finished card. 

Version II

   1. Using coloured card stock cut one piece  7" x 5.5" and one piece 7.5" x 5.5"

 
2. Score the piece that is 7.5" in length at 0.5" and fold. Using d.s. tape attach to     the other card to make one card piece that measures 14" x 5.5"

3. Make pencil marks at 2.5" on the short sides and on the long length at 5" and 9".
4. Join the dots up at the 5" and 9" marks and make an X as before in Version I. No2.  Draw lines from the 5" and 9" lines  out to the 2.5" side marks and cut the 4 outside triangles away as before.  You will now have a kite shape that is card size

5. To finish the front of the kite you will need 1 piece of design paper and 2 pieces of plain card for the matts inside the kite. To get the measurement lay the kite card down on the chosen card and with a pencil draw around the kite. Cut out inside the lines so that the matts are slightly less in size as shown below.

6. Decorate the front of your kite as required. Make a tail either from string or ribbon and attach at the V point at base of kite.  Because of its size the card will not require a closure.