Friday, September 02, 2022

Cube Card

C
 is for 
CUBE CARD.


Version 1.
This is a picture of a finished card using the design instructions to make.
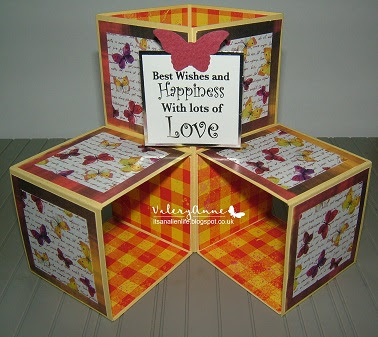

1.  These instructions are for making a card that when closed down flat will measure
 4"x 4".
Cut a piece of card stock  8.5" x 8".
On 8.5" side score all the way down to the bottom at 2", 4", 6" and 8".
On 8"side mark and cut at 2" and 4".
This will give you three pieces of scored card stock.

1 strip measuring 4" x8.5" and 2 strips that measure 2" x 8.5"


2.  Take the larger piece and fold at the score lines as shown below.


3. Repeat  with the 2" strips.
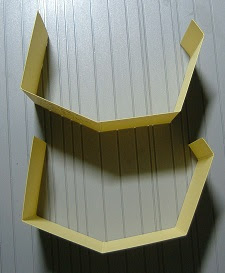
4. Lay the strips back out flat and adhere d.s. tape to each of the half inch flaps as shown below. 


 5. Turn the 4" (Large strip) over and apply design paper on the two panels shown below.  


6. Fold the right hand side over and remove the backing tape.


7. Fold left hand side over to close and seal.


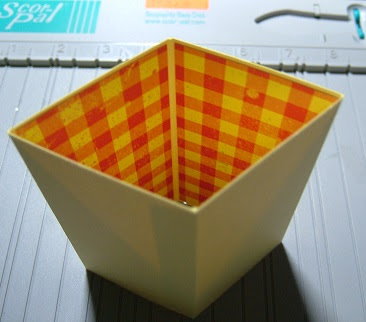
8. Your cube should now look like below when stood up.
 

 9. Turn the 2" (small strips) over and apply design paper on the two panels shown below. 
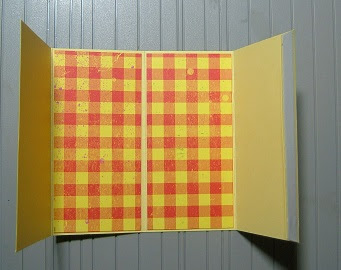


10. Fold the right hand side over and remove the backing tape.

11. Fold left hand side over to close and seal.


12. Your cubes should now look like below when stood up.


13. You now need to attach the cubes together Arrange the three cubes in this configuration as shown below,
paying attention to where the design papers have been adhered on the insides of the cubes. 


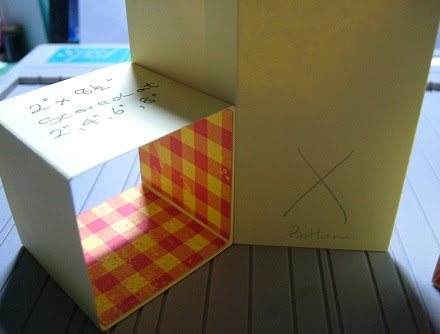
14. For ease  I have marked an X on each piece where it needs to be attached. See below and follow the pictures. 


 15. Attach the second cube in the same way. 

16. Card should now look like below with your chosen design paper all facing outwards. 
 

17. The cubes now need to be decorated so choose 2 different complementary design papers.
Cut six pieces a little smaller than 2" x 2".
Cut six pieces 1.5" x 1.5".
Adhere a large square with a small one on top  as shown below.


18. Cover the back with design paper and white card stock with space  to leave a message.


19. Attaching a sentiment to the front of cube.  On the reverse of your chosen sentiment mark the centre with a pencil line. 


20. Cut two narrow strips of cardstock. N.B.(These do not have to be very big, no more than 1.5" long as you are just creating wings on the back of the sentiment in order to attach to your card. As my sentiment is only small I have cut them to the same size as the sentiment.) Fold each one in half. 


21. Place folded strips on your marked line and glue in place.


22. Place glue on the  remaining flaps shown above and adhere to the front of your card by folding card flat as shown below and attaching a flap on either side of the fold. 


Sentiment folds flat posting. 


Version 2.
This is a picture of a finished card using the design instructions to make and is just a larger version which gives more space for inserting a sentiment/image between the bottom cubes. 


1.  These instructions are for making a card that when closed down flat will measure
 5.5"x 5.5".
Cut a piece of cardstock  5.5" x 11.5".
On 11.5" side score all the way down to the bottom at 2.75", 5.5", 8.25" and 11".
Cut 2 pieces of cardstock 2.75" x 11.5"
On Each 11.5" side score at 2.75",5.5", 8.25" and 11"


2.  Continue making the cubes in the same way as in version 1. Just adjust the sizes of the design paper panels for the large cube  to be  2.5" x 5.25".

The Design squares for decorating the cubes will be slightly larger too.
 Cut 6 design papers at 2.5" x 2.5" and 6 design papers at 2.25" x 2.25"

Version 3.
This is a picture of a finished card using the design instructions to make a Cantilever
Version. 


1. Use the instructions and sizing for Version 1 but instead of adhering the two smaller cubes side by side as shown in steps 15/16 simply offset one cube at the top.
I have not seen this done anywhere else so this is my idea. 


Wednesday, August 17, 2022

#172 Spin The Butterfly Wheel with F for Faux Stepper Card

The Butterflies are back with another card shape for you. 
Whilst I do have lots of new card shapes to try I don't have one to use for each letter of the Alphabet so this time round we are going Random and some letters will be used more than once and in any order!

 The next letter out of the Tea cup is 
the letter
F
Come on in.
Lets Spin the Butterfly Wheel.


Each challenge will be a letter of the Alphabet with a new  choice of 4 Colours , 1 Theme and a specified Card shape all beginning with the chosen letter.

As before I will be showing a tutorial for each of the card shapes.
 A link to the tutorial page is shown above under the banner heading. Just click on the Card Shapes tab and you will be taken to a drop down list of all the past and present card tutorials.

 You must of course use a butterfly on your entry but there are now two categories for you to choose from.

1.    Make any  card using at least 2 of the colours on the wheel +butterfly.  


     2.    Make a card using the Card Shape +any 2 of the colours + the theme +butterfly.  

There will be a prize for each category. 


 Please state in your post which part of the wheel you are using to play with.

There will be a special prize draw for using all elements on the wheel.

So lets get started.

The wheel is
F

and 

Faux Stepper Card.

No cutting apart from your base card.
Just folding.


These are the four colours to choose from. 

Fandango = Bright Pink
Fulvos = Dark Yellow
Flirt = Violet


The theme is  Faux Stitching.

Please state the elements of Your Choice.


Here are my inspiration cards  for you.

Card 1.
Using from the wheel
Faux Stepper Card/Faux Stitching/Forest Green/Butterfly


Stepper section set off to the left side of card in photo.

Card 2.
Using from the wheel
Faux Stepper Card/Faux Stitching/Forest Green/Fandango/Flirt/Butterfly

Stepper section set to centre of card.

Card 3.
Using from the wheel
Faux Stepper Card/Faux Stitching/Forest Green/Fandango/Flirt/Butterfly


Stepper section of card set off to the left in picture and image set back.

Card 4.
Using from the wheel
Faux Stepper Card/Faux Stitching/Forest Green/Fandango/Flirt/Fulvos/Butterfly


This style is a Faux Centre Stepper Inverted card
Please pop over to my blog here for more pictures and details of each card shown above.


 Prize.
For entering any card using any 2 of the colours + your butterfly
Please state in your post the colours you are using. 

Butterfly ribbon
Crafts Concepts  Embossing folder 'Safety Dance'
Die cut corners set 
Docrafts Bellissima 'Doily Frame'
Red Ink Pad
Penny Black Stickeroos 'Touched By Love'
.

 Prize.
For entering a Faux Stepper card using any 2 of the colours + Theme + your butterfly
Please state in your post the colours you are using.

Butterfly ribbon
Creative Expressions 'Just A Note' sentiment
Craft Mania Butterfly stamp set.
Marianne Design Flower and leaf  die set
Whimsy Stamps  Elegant butterfly die
Black Ink Pad
Penny Black Stickeroos 'Touched By Love'


 For anyone choosing  to use all of the Wheel
their names will go into the teacup for a special Prize.


Please be sure to read all the rules on the tab above.

Enter your creations in Mr Linky below.
Please also state if you are only playing for fun.

Happy crafting and see you soon.
 
This challenge will be  running for 3 weeks.
Challenge will therefore end 

Tuesday 6th Sep 8pm (GMT)