
S
is for
STEP BLOCK CARDS.
is for
STEP BLOCK CARDS.
Version I
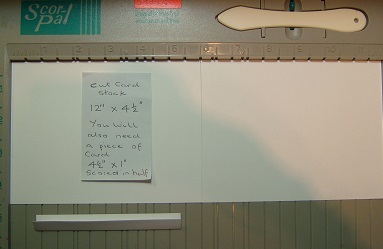
1. Cut cardstock to 12" x 4.5". You will also need a piece of cardstock 4.5" x 1" scored in half along it's length.
2. Score along the 12" length at 1.5", 3", 4.5", 6", 7.5", 9”, 10.5" all the way down.
I have marked the score lines in pencil purely so that they show up clearly,

3. Score short side at 1.5" and 3" down the entire length.

4. Your 12" x 4.5 " cardstock will now be divided up into 24 little 1.5"square blocks.

5. You now need to remove the sections marked using scissors on the score lines as shown.

6. Cardstock should now look like photo below.

7. I have marked in red where the lines now need to be further cut to create the steps.

8. Once cut , crease and fold as shown in photo below.

9. Now fold cardstock in half at the 6" line

10. Open back out and on inside left short edge adhere the folded edge of the thin strip to the cardstock as shown

11. Now fold over the other short edge on top as shown,

12. Turn box so that the joined edges are to the bottom as belwo.

13. Crease the 1st score line into a moutain fold.

14. This will enable the box to now stand up.

15. Now adhere the bottom flaps to close the 1st step in the box


Version II


and decorated as required.


6 comments:
Brilliant tutorials - will have to try one or the other...!!
Fantastic!! You make it look soooooo easy that I shall have to try it. Thank you so much for sharing and going to all that trouble for us. You're a gem.
Wow thank you so much Mrs A these instructions are so useful. Take care. Hugs Jackie
Aww wow your tutorial Mrs A is spot on so creative you are too l love the end result x
Great tutorial, Mrs. A. I don't know if I'm brave enough but I guess we'll see...
Fabulous tutorials! Thank you
Post a Comment