
F
is for
is for
FLOATING STRIP CARD
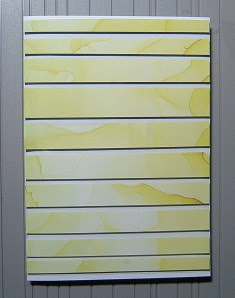
Tutorial I
This is a picture of the finished card design.

1.Either use a card blank which is 4" x 6" or cut a piece of cardstock 8" x 6" and fold in half along the 8" width.
2. You will need strips of card stock in varying widths and choice of colour.
Piece of acetate to fit your card front.


4. Adhere strips to the piece of acetate. Try to leave the same gap between each one.

5. When complete turn over and trim the edges to neaten.

Tutorial II
This is a picture of the finished card design.

1.Either use a card blank which is 4" x 6" or cut a piece of cardstock 8" x 6" and fold in half along the 8" width.
2. This is what you will need to make the card.
Strips of card stock in varying widths and choice of colour.
Piece of acetate to fit your card front.
A flower die. Here I have used a small pansy.
A Circle die. Here I have used a 3.5" diameter one.
Card Base.

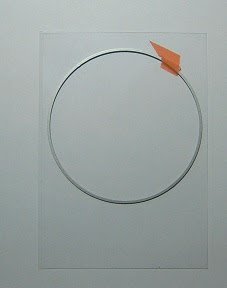


7. Adhere foam backed tape to the reverse of the strips making sure that none will show on the front.


Finish off card as required.


4 comments:
This design really has me drawn in Valery-Anne, I have DT work sitting on my desk to finish and post, but today I have just got to have a play with this one.
Hope all is OK with you, I've been an absent blogger of late and it's slow progress getting there, the sunshine might help.
B x
So beautiful and creative cards Mrs A your talent is 100% xx
Fun technique and love the orange and yellow pansy card. HUgz
These cards look amazing, I really must try this. Thanks for the tutorial.
Post a Comment