Wednesday, October 07, 2020

Herringbone Card

H
is for 

HERRINGBONE CARD.


Version I
Classic Herringbone

 1. Cut a piece of card to measure 5.75" x 4.25".  Using thin strips of cardstock divide the card off into quadrants . You can choose where they go but just make sure you do not make a cross or an X with them.They need to be off set as shown below.


2. Tip. All of the cards I have seen made, tell you to use either a tape runner/wet glue across the front of the piece of card or to apply a sheet of sticky adhesive to cover the entire card. This can be quite messy as you try to work around the card and not get your fingers or the sleeve of your cardigan stuck! My solution is to apply double sided tape only to the strips of paper you are going to be using. I attach strips of d.s tape to the wrong side of the paper I am going to use before I cut my strips. This way I can lay the strips down to make sure that they will not only fit but also that I am happy with the paper design. Only then do I go ahead remove the backing on the strip and adhere down. 
3. Complete one section at a time. Another Tip is to to use the same colour strips in between your pattern strips as  shown below. This helps to give a coordinated look to the design. 

4.When you have  completed one section turn over and trim away the excess leaving a small margin. 
5. Move onto the next section and complete as above trimming the excess away as you go.
6. Continue to move round the card
6. When each section has been completed make your final trim and use your panel to decorate your card base as required.
7. Here is my completed card. 


Version II 
3 Bar Herringbone


1. Cut a piece of card to measure  5" x 6". Cut your card strips half in wide. (0.5"). Washi tape works well for this particular design as well. 
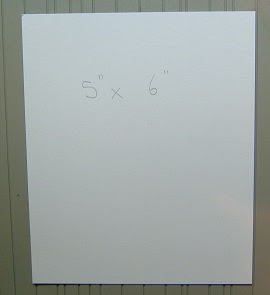
2. Place 3 strips of your chosen papers diagonally across the top of the card leaving a small even space in between.  (This is where my tip in Version I really comes in to play with using d.s. tape on back of strips only).
3. Infil the top section of card as shown below. 
4. Using your middle 3 papers as your guide slightly off set 3 strips below the 3 bar panel and use design papers in a different order otherwise you will just end up with stripes going diagonally down the paper. 
5. Now add another 3 bars diagonally either side of the middle strips making sure the patterns differ. Change direction again and fill in the last two spaces below. 

6. Trim around the edges and finish your card as required. 
7. Here is my completed card.


Version III
Quilters Design.


1. Cut a piece of card to measure  5.5" x 6". This time you need to cut 7 squares that measure 1.5" x1.5". The design  looks particularly pleasing if you just use two different coordinating papers in the same colour.  (I used 2 papers from the same paper pack.)  One  square remains intact. Cut the other 6 squares in half to give you the long panels.  Start off by placing the one whole square on the diagonal with both points right on the edge of the card as shown below.


2. Start to place the cut panels in a brick effect alternating the design papers in a pleasing fashion. 


3. Continue down the page. Tip Arange the papers to your liking first and only adhere down with d.s tape when you are happy with the design. 
4. Once you are happy with the over all design adhere down and complete your card as required.
4.  Here is my completed card.


Version IV 
Trifold Panel.

 1. Cut a piece of card to measure  9" x 6". Score and fold  at 3" and 6" on the long side to make a trifold shape.
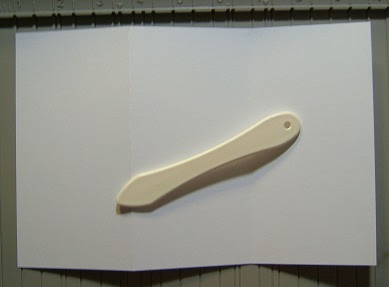
 2. Divide each of the three panels up at  1.5", 4.5" and 7.5" Draw a pencil line from top to bottom at these marks.  Dot not fold on these  marks.
 3. On the left hand edge make a pencil dot at 1",2",3",4",5" down the page. Repeat on the pencil lines and the 2 scored lines across the length. n.b I have only showed you the first panel. Now from the top left of panel down to the 1"mark on the first pencil line draw in a line to join up. Then repeat at the top right side down to the 1" mark to make a V shape. Continue down to the bottom of the page.   
 4. Repeat on panels 2 and 3.These will be your guide lines for placing your herringbone pattern.

5. Now you can start to create your pattern. Pre cut your strips using the method I have stated in Version I above.  I have cut my strips to be .5" (half an inch). Decide on your pattern and start to cut and stick the design paper in place as shown below.
6. Continue down the first line.
7
. Using your strips in the same order complete the next line which creates the complete herringbone design. 

8
. Now it is at this juncture I am going to say "Do not do as I do, do as I say".   If you are going to use a striped pattern paper when you cut your strips you need to reverse the paper each time you cut a strip off other wise the below happens!! 
 When you go to marry up the next strip it won't. I had already cut all my yellow strips out and did not have any more of the paper to use so I have made an example up in black/white to show how it should look.  I had to carefully prise the yellow strip off of the card and replace with a yellow dotted paper. (Playing safe).
9
. Continue down to complete the first Tri fold panel. Trim nearly to the edge as you go and then turn card over to trim away the excess neatly.

9. Continue with the next two panels to cover the cardstock. 

10
. Complete your card as required.


Version V 
Random Broken Herringbone.

 1.This is a variation of the panel above.To create cut a piece of coloured cardstock  to measure 5" x 5". Score at 1",2",3" and 4" across the top and then turn cardstock over so that the ridges of the score lines are uppermost. 

2.Here I am showing on white card( so that it shows up) to create various depths of each coloured design paper that you use. You want them to be random.  Remember (as above) to reverse how you cut your strips to get the herringbone effect. 
3.Here is my collection of strips that I have marked on the reverse and adhered ds. tape to before cutting.
4. Create your pattern across the  card. I started with the  brown spotted design paper top right (as you look at the picture) and then infilled above and below on that  single panel working across the paper to the left of picture. In order for the pattern to stand out it does need at least one line to be the same  pattern across. They do not all have to be the same depth. Here I have three lines across the cardstock using the same design paper. The pale cream with the flower design is all the same depth at top of page. The next continuous line (just over half way down) uses the brown spotted paper with one panel cut different. Again the last line right at the bottom using the pale cream with the flowers  has one panel a different depth. It makes a really striking but at the same time subtle designl. The panel is completely flat but visually  looks 3D.

4. Complete your card as required. 


Winners #147

Thankyou to everyone who came and played along in the new set of challenge letters.There were 16 entries. Not so many this time but I am very grateful for those of you have taken the time to come along and play with me. All of your cards were lovely.

I have selected the following non shape cards for my top (4 as I couldn't get any lower) and in numerical order they are as follows:


#3  Kathy A.


#8 Jane Willis


#11  Lia


#13  Aquarius 


My top 3
 Double Point Cards in numerical order are as follows:


# 4 Annie


# 7 Hazel (Didos)


# 12 Liz Cavill
(also a winner see below)


Congratulations everyone.
please take a bow and help yourselves to
The Top 3
Badge from the side bar.

The Prize winners are as follows.


1st Prize.
(for using either One Theme or One Colour with your butterfly/ies)

The Winner picked from the tea cup is:

I have two This time


(1) Donna

&

(14) Craftartista


2nd Prize.

 (for using both a Theme and a Colour + your butterfly/ies)

(16)  Elle - Jeanne


Top Prize.

 (for using The double Point fold card + all other elements + your butterfly/ies)

The winner picked from the Tea cup is:

(12)  Liz Cavill


Donna, Craftartista, Ellie-Jeanne,  and Liz
Please get  in touch using the email address in the side bar to collect your prize.

Please also take the Winner's Badge from the side bar.
Can I also please ask that you acknowledge your win
In the comments box below so that 
I know to expect an email from you. 


Normally I adhere strictly to the cut off point but I am going to make an exception and showcase a card here that Kathy made and missed the deadline  with by a whisker as it is such an unusual card. 
Kathy used the Double Point shape to make a Christmas card.

and here is the inside.
Thankyou Kathy for sending me the link. 


Hope to see you all back for #148

Stay Safe and Well.
Hang onto those Loo Rolls!