H
is for
HINGED CARDS.
is for
HINGED CARDS.
Version I
This style of card is based on using a fancy filigree shape die such as the ones made by Spellbinders.
I have used Spellbinders 'Marvelous Squares' for this Tutorial.
Using your choice of die, cut one piece from plain cardstock.
Tip. When using intricate dies I use wax paper between the die and the design paper for easy removal.
Take a larger piece of cardstock and score a line 1" from the edge and fold under.
Now place this (fold side down) on your cutting plate, then the wax paper (if using) and finally your die cut. Position the die cut so that it is only just overhanging the folded edge and tape in place.Tip Washi tape makes a good temporary fastener and does not leave a mark or tear the card stock when removing. Place second cutting plate on top and put through your die cutting machine.
You should now have two pieces of card stock as below. One which has a hinge on it.
Apply double sided tape or wet glue to the hinge area only.
Adhere to the wrong side of the front so that when the card is closed the smooth side of the cardstock is to the outside. At this point if you do not mind seeing the join then you can just go ahead and finish your card.
I prefer to have the inside as neat as the front so I die cut one further piece of cardstock using a lighter/thinner design paper.
Here you can see I have added the design paper to cover the join and also used the same paper to decorate the inside of the card where the sentiment or plain card (for signing the card) will go.
Version II
How to make a hexagon shape card using a hexagon die cut and cardstock when
the cardstock is too small to simply fold in half and place the die cut to the fold to create your card. Follow these simple instructions instead to create your own card base.
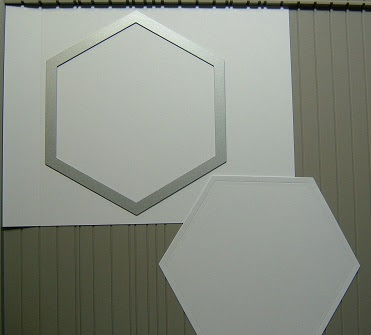
Die cut one hexagon from cardstock. From a larger piece of card score 1" in from one end and fold under.
Now place this (fold side down) on your cutting plate, then your die cut. Position the die cut so that it is only just overhanging the folded edge and tape in place. Place second cutting plate on top and put through your die cutting machine.Adhere double sided tape to the hinge and attach to the other hexagon shape to create your card base as shown below.
You can decorate the inside of the card to cover the hinge that is showing.


7 comments:
Thank you. Hugs Jackie
Thanks for this great tutorial!
xxx Margreet
Perfect tutorial ! Thanks.
Thank you. I have never tried this way.
Will have to try these!!
Brilliant! I think even I can do one of these!!! lol...
Thank you for the tutorial.
<3 J
jwoolbright at gmail dot com
HerPeacefulGarden.blogspot.com
Thank you, thank you, thank you for this easy-to-follow tutorial. I admit that I had to read through it three times because my mind needed time to catch up..but I've got it now. Off to give this a try!
Post a Comment